Chủ Nhật, 1 tháng 12, 2013

It's been quite some time since I did one of these (I've done them before in pink and rainbow), this time I went with colors that feel a bit more appropriate to this time of year. Somehow this is marked in my head as a more time-consuming nailart, while in fact it's real easy and fairly fast as well!


The New Black Typography Weekly Journal base with Essence A Piece Of Forever, Catrice Rusty But Sexy, Essence Love Potion! and BornPrettyStore Super Matte.


And just to inform you, my MoYou-London giveaway has ended, I've contacted the winner and she has replied. Congrats to Martina! :) Have a great Sunday all!

Thứ Năm, 24 tháng 10, 2013

Hi guys! I have some amazing plates to show you from MoYou-London! And because I haven't showed some nail art in a while now, I couldn't resist making 2 manis, but let's look at the plates first :)


Oh my, isn't that the cutest plate packaging ever?! Each plate comes in a packaging like this (for the people who've ordered before, they just added this new packaging a few days ago!), and every collection has an own girl. Meet Joan The Pro and Lea The Princess!


The back of the packaging shows and describes how to stamp, the plates have a protective blue foil that comes off easily, and a plastic back with the brand name. Even though the back already prevents sharp edges on the plates, the plates itself aren't sharp either. It looks like MoYou-London really has a lot of attention for detail!

Especially loving the swirly images, the bubbles image, and the top left one I'll show below!

MoYou-London has images in different sizes: their standard size is somewhat smaller and perfect for girls with shorter nails (they fit fine on my preferred nail length as I'll show below), but they also have XL Designs for people with longer nails. And they even have plates with just 1 ginormous image!
Some of the images on plates with smaller images are also used on the XL plates, so if you love a design but have long nails, check their XL plates as well! The plate above and below show that as well, the images with the dandelion and the little dandelion things (no clue on the name, lol) are on both plates. Also great for when you want to wear the same image on all nails, an image might fill up my pinkie but look mini on my thumb, but with various sizes that won't be an issue.

Double roses for 2-way print, swirly and splatter, and that bird! The text and face were my testimages, shown below as well.

I really had a hard time choosing plates, and MoYou-London is bringing out new plates at high speed, but luckily a lot of them weren't available yet (only for pre sale) when I got to choose, so that made things just a little easier! But they have SO many plates that I'd love to try out, and I'll warn you in advance, you'll end up with a full shopping cart in no time! =)

Even though I have a lot of animal prints already, I couldn't resist the butterfly image, the turtle back and the peacock feathers :)

Buttons! And even more swirly images (can you tell I love those? :)) + a bunny that's perfect for Easter!

Of course I had to try these out, and I decided to go for 2 fine lined images. I used the text image on all 3 nails without cleaning the plate in between, and on my pinkie it transferred a bit less good by then. I like to try out such things to give me an idea of how deep the images are when I'm trying out a brand that I haven't used before :) Fine lined images can dry in the blink of an eye, and the deeper the image is, the more time you have. Because these images aren't shallow, I had enough time to make a good transfer. I'd still advise you to clean the plate in between with such images to get a perfect transfer every time, or just clean the plate whenever your stamp isn't showing a good transfer anymore!


The New Black pink & peach from the Shibuya set with Konad Black and MoYou-London plate 04 from the Pro collection.


But I just had to try out another image, and went for a mani that's a little bit more me :) I used a Catrice polish with brushed metal effect, and I wanted to use top coat, but after seeing how it looked without, I decided to leave it like this!


Catrice How I Matt Your Mother with Kiko 622 Wisteria and MoYou-London plate 06 from the Pro collection.


I've updated my image size comparison, the size of the normal MoYou-London images (as shown on 3 of the plates above) is a bit smaller than the average image size, but their XL images are clearly a lot bigger than most! According to their site the XL images are about 1,5x2,0, but the ones on the XL plate that I have, all measured 2,1/2,2 cm instead. Small difference, but maybe worth to mention for the really long-nailed girls out there :) The only downside to these plates is the actual plate size, they obviously won't fit in platefolders!


I'm sure my post already made clear that I love the MoYou plates, so instead of telling you even more about how these plates are made of pure win, I'll go fill up my wishlist instead! =)
The MoYou-London plates are available on their website, and cost £4,99 each. You can also find them on Facebook.

Thanks for looking and have a great day!


The product(s) in this post was/were send to me for review. For more information, please have a look at my Disclosure Policy.

Thứ Tư, 14 tháng 8, 2013

First of all... 3000 readers via GFC! *happydance!* Thank you all so much for sticking with me, especially during my breaks, and welcome to my new followers! :) It's a huge milestone for me, I never imagined getting thát many readers and it's awesome to see how far this little blog of mine grew over the past 3 years. There's a lot I could say but with these kind of things I always seem to lack the words (which is quite annoying I must say, haha), so I'll just leave it at a humble thank you ♥

For today's post I have a review for you, this time of The New Black Typography Weekly Journal set! But not every nail product is as awesome as we'd like it to be, and unfortunately this is one of those products that didn't fully live up to my expectations. I could just state the facts about this set and let you draw your own conclusions, but I rather give my honest thoughts about it as well. So here we go! There are 3 different Typography sets, each contains paper, transfer solution, a clear top coat and a nail polish (the color depends on the set) to create newspaper nails.


My first thoughts of this set were actually pretty good, you get the paper with text that's printed backwards. With normal newspaper nails (which I did a few years ago as well) you end up with the text backwards on your nails, with this set that's not the case. However, you can print out text yourself as well to solve that problem (there are various ways to do newspaper nails besides the original ones with just alcohol and newspaper, Nailderella shows one of those).

The set comes with 10 sheets of paper, half of them have bolded text, the other half has the text in various styles. The text is made up of words like Cherish, Dream, Live, Imagine, Love, Hope, Faith, etc. which I like. When people read your nails they'll actually recognize the words instead of having random text that doesn't make much sense! The sheets are big enough to easily do all your nails with 1 of them, and with my current length (freshly filed), I think I can even do 2 full manis with 1 sheet.


What I also liked was that the set has the transfer solution, which means you won't have to get alcohol, right? Wrong, as I found out after reading the inside of the package! So you still need to get alcohol, although many of you might already have a bottle lying around somewhere. But that does make me wonder what this transfer solution is!


The Weekly Journal set has a light beige polish as basecolor, which covered in 2 coats. I do like the color, but as usual it's just a 4ml minibottle. I wish TNB would bring out at least come colors in full size as well! After I applied the polish and let it dry, I followed the directions on the package.
The transfer solution had a hard, somewhat wonky brush, and for a moment I thought the whole bottle had dried out, but the solution itself was fine. And because the solution was so thin, it didn't matter all that much that the brush was a bit weird. I worked one nail at a time, placed the paper onto my wet nail, applied more transfer solution, and pressed down with the alcohol - all just as it said. But when I removed it, some of the paper actually got stuck on my nails! I tried to get it off, but ended up just smudging the text. The text itself did copy well and very clear, which was a big plus.
Then I tried the top coat (which looks fully clear on the website instead of pink like mine, but it's fully clear on the nail as well). But ugh, it smudged so badly! Here you can see what I mean:

Indexfinger (bold text and top coat) vs ringfinger (bold text). Both my middlefinger and ringfinger also have some paper stuck, which is most visible on the center of my middlefinger (including some smudges from me trying to remove it). My pink and middlefinger have the text in various styles.


I was hoping the top coat was my fault, by not using it generously enough, so on my middlefinger I tried it again. This time with even more top coat and being extra careful to apply it floating, but it still smudged badly. For my last 2 fingers I used my standard top coat Seche Vite, and the difference is quite clear.

Index (bold text, TNB top coat) - middle (various styles text, TNB top coat) - ring (bold text, SV top coat) - pinkie (various styles text, SV top coat).


So all in all, this set has several downsides for me, and the last one is the price. But I do like the papers, and I do like how it can look, so I would use those again. But then I'd try using them in another way, to prevent the paper from getting stuck. I'm not sure what caused that, I applied it the same to all nails. Maybe my nails weren't fully dry afterall, but why didn't it stick to all nails then?
A quick first test shows that using alcohol only transfers fine as well (without risk of getting paper stuck), using the solution makes the text show just a bit darker. I haven't experimented enough with it yet to really be able to tell the difference between using the transfer solution and alcohol / using alcohol only / using another method. But what I do know for sure, is that I'd use my own top coat straight away next time! Have you tried any kind of newspaper nails?

You can buy all of the sets on The New Black site, the Typography sets cost €24,95.

Thanks for looking and take care :)


The product(s) in this post was/were send to me for review. For more information, please have a look at my Disclosure Policy.

Thứ Ba, 16 tháng 7, 2013

Hi guys! Long time no see! :) Let me start with a huge THANK YOU for all the sweet comments and emails, that really overwhelmed me and I really appreciate all the support I've gotten after my last post!! I recently had a wedding of a nephew of mine and the mani I wore that day felt like a good mani to come back with as well, you guys showed so much ♥ and so does the mani, haha.


The New Black teal (from the Waves set) with Essence Caribbean Sea and BM plate 317.


For the wedding I wanted to wear a mani with subtle hearts and I wanted the color to match my shoes. Turns out that from all the teals in my stash, there wasn't a single polish that made a perfect match! Some were close though, but that sounds like a good excuse to buy more polish, no? =)
Anyway, the stamping turned out a bit too subtle, only visible in some light, I think the stamping polish wasn't only too close to the base color, but the image was finer than I expected as well.


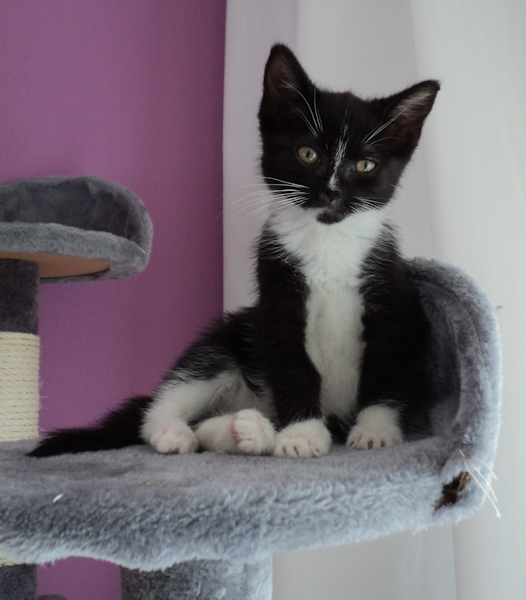
So much for the nails part of this post :) It's going a lot better with me since my last post and I've been enjoying things like fixing the garden and decorating a room that wasn't done yet in my house, but I also had a little foster kitten called Noomi:


Naaaww, isn't she adorable? ^^ She's up for adoption now, and you can see more from her here. Right now she's back at the shelter though (the other blog isn't updated with that yet), I already decided that I didn't want any kittens around when Bindi's situation got worse, and unfortunately that did happen while Nomnom was here. Bindi's tumor has grown a lot in such a short period of time, and I discovered a new tumor as well, bleh :/ That really got to me again, and I just wanted to give her even more tlc, which is a bit hard if there's a kitten going nuts in your house! Right now Bindi's situation seems stable, but I know from last time that the tumors can grow like mad all of a sudden, and with the size they're at now, I'm happy with every month I get with her. Bindi is doing fine though! She doesn't seem to notice them at all, but I'm keeping a close eye on her of course to prevent any discomfort.

And to continue with my little update, as you know I've been afk for a while now, and during that time I also missed the 3 year anniversary of my blog! Even though I had some breaks here and there, I never expected my blog to last this long! I had a great time blogging those years and a large part of that is thanks to you all ♥
But during my break I barely wore any polish (I now know what my nails look like without stains, lol!), and to be honest, looking at my review drawer I just felt overwhelmed at times with what I still had to review. But I'm swatching while I'm writing this, so you can expect more posts soon! And for now I'll stick to just the blog, I'll ignore things like Instagram for a while, and just slowly get back into it a bit :)

Thanks for reading and again, thanks a lot you guys!

Thứ Ba, 26 tháng 3, 2013

Hi guys :) The New Black kindly send me some of their sets for review, and today I have the first 2 for you. All their polishes come in sets that easily combine to create things like an ombre mani. The first set that I swatched the other day is one of those, it's the set called Waves from their Original Ombre line, and it's a set of 5 polishes in blue/green/teal colors.


Waves
The New Black Waves
Waves

If I think of an ombre mani, I think of 5 polishes that are the same in finish, and just vary slightly in color from light to dark. TNB takes it a step further, and combines different finishes and varies more in color as well! As you can see, the color on my thumb leans a lot more blue, while the color on my pinkie is green. Those 2 are cremes and applied in 2 coats, the 2 shimmers and the glitter needed 3 coats. I thought the lightest color would be a bit streaky, as such pale cremes can be, but I had no problems with it at all. I did use top coat here, because the glitter dried a bit gritty.

The color on my middlefinger looks similar to my ringfinger, but it's not. It's actually a very bright & pretty green shimmer! It's so bright that it even dries a bit matte, so almost neon, and with that, it's unfortunately instantly beyond my camera.

The New Black Waves
Waves

The New Black Waves
Waves


The 2nd set that I'm showing today is the Miami Vice set, from the Subculture Contemporary Neons line.

Miami Vice

All TNB sets come in a package like this.

The New Black Miami Vice
Miami Vice

What did I say again about bright colors being way beyond my camera? Bleh, here's another one, it's a bright, peachy pink color and boy do I love it! I just wish my camera could handle such colors :( I tried making pictures in the sun as well, but those looked like a failed duochrome on my nails, lol! The pink applied in 2 coats, and it's again a color that I kinda expected to be somewhat streaky, but it wasn't.

Besides the pink, this set also has a fine gold glitter in a clear base. As you can see, it covers quite well if you'd want that, but I grabbed a sponge and went for glittery tips instead, finished with top coat.

The New Black Miami Vice
Miami Vice


What I like about these sets is that they give an easy way for people to find a nice match, TNB has plenty choice to pick a set that has the colors and finish that you like. They apply smooth, and especially with the pink one that I tried today I noticed that they dry fast as well. The sets also inspire to get creative, I used the Waves set as an ombre, but I instantly thought of gradients, dotted gradients and taped manis! The Miami Vice set would look nice with a golden accent nail as well, and they also have Youtube vids to show what you could do with some sets. And the colors of the sets just work well together! I wouldn't have thought of combining that pink with gold glitter, but I really love that combo! ♥

But I have to be honest here, there's some things that I like less as well. The polishes don't have names or numbers (or well, the Waves all have the same number), which isn't so handy when you have a bunch. They only sell the polishes in sets, which means if you run out of one and would want it again, you'd have to buy a whole new set. Now normally you maybe wouldn't empty a bottle as fast, but these are minis and a bottle contains only 4ml. That brings me to my last point, and that's the price. I often don't comment on the price, because people have different opinions on what they want to spend on a polish, but personally, I find these quite expensive for minis.

You can buy the sets on The New Black site, and do keep an eye on their European Facebook as well, they had quite a few giveaways so far! The Original Ombre sets cost €29,95, the Subculture Contemporary Neons sets cost €13,95.

Thanks for looking! :)


The product(s) in this post was/were send to me for review. For more information, please have a look at my Disclosure Policy.
nghe nhạc trực tuyếnNấu món chay | học nấu ăn DJ - Ảnh đẹp | xalotinnhanh