Thứ Ba, 20 tháng 12, 2011

Beaded bracelet bells

biser.info_2610_kolokolchiki_070430.preview (479x359, 22Kb)
Beaded tiny tulip
biser.info_825088086488e48b0a0fe0_o (462x512, 62Kb)

Thứ Hai, 10 tháng 10, 2011


Crafty jewelry: Hurricane Bracelets tutorial


In an attempt to grab hold of the last moments of summer, and to kill time while stuck indoors during the hurricane this weekend, my friends and I got together to make old school bracelets. Once we got started it was like riding a bike, and each only took about an hour. I am a fan of rocking a them with a bright watch, or mixing one with a wrist of mixed metal. 
 
Supplies: Gimp, or Lester lace as we called in back in the day, from Blick Art (less then $2 a roll), scissors, and a fastener. Steps after the break...
 
Cut two piece, each as long as your wingspan.
Start by threading the black strand through the fastener loop, and move it to the middle of the strand.
 
Wrap around the front and back of your finger.
 
Take your orange string under both black loops, and put till you reach the middle of your orange strand
 
 Next take the right end of the orange and go over and under in the front, and then take the left end and go over and under in the back. 
Pull slowly to create a square knot
 
Next loop your orange pieces over the square knot diagonally
 
Thread the right end of the black through the orange hoop in the back, Thread the left black end through the orange hoop in the front. 
 
It should look like this as you pull the four pieces 
Repeat and the pattern should like this
 
When your bracelet is long enough to fit around your waist, tie all four pieces in a knot at the end. Then thread one strand through the other end of the fastener
 
Tie the ends in another knot and trim ends.  
 

Candy Corn Bracelet
There are so many fun and interesting bead weaving techniques out there, that it takes a lot of time to try and master them all. Sometimes we see a technique that we like, but hesitate to experiment with it. Maybe it looks too difficult, or we think that it won’t suit our tastes, so we avoid using it and stick to the stitches that we really like.

 Crafty jewelry: Beading Tutorial, Square Stitch
This is how I felt about square stitch for a long time. I just didn’t see the point in learning another flat bead weaving stitch. Peyote was working just fine for me. Then I encountered a design dilemma, where I needed a grid-like stitch, and loom weaving was just too complex for my purpose. I pulled out an old square stitch tutorial and tried it out, only to discover that it is an amazing technique!

Square stitch is so delightfully simple, the steps can almost be explained in a single breath. And because the rows and columns are perfectly aligned, you can use ordinary graph paper to create and plan unique patterns and designs. Square stitch can be worked with almost any type of seed bead, and looks fabulous with triangles and hex-cuts.

To weave a square stitch panel:

Square Stitch Tutorial
Attach a stop bead to a comfortable length of beading thread. If you’re working with beads larger than 11/o, it’s a good idea to leave an extra long tail, so you can add more reinforcements to the beadwork later.

Pick up any number of seed beads, odd or even. These will make up the base column. If you’re making a rectangular piece, like a bracelet, this will be the short side.

How to Weave with Square Stitch
Turn the stop-bead away from you, and hold the new beads against it with your free hand. Pick up one bead, and stitch down into the last bead from the first column. Pull tight so that the new bead rests side-by-side with the other.

Square Stitch Beading Tutorial
Stitch up into the new bead and pull the thread snug. Pick up a new bead, and stitch down into the next bead of the first column. Pull snug, and stitch up into the new bead.

Repeat this process up the column, and stitch up into the last bead added to exit from the edge of the beadwork. Flip the panel over and start again from the bottom, adding one new bead to each one from the last column.

How to Bead Square Stitch
If you’re working with a large quantity of beads in each row or column, or if you’re using bigger beads or Delicas, you will want to reinforce each column before adding a new one. To do this, stitch down through the previous column, then up through the one just added before you resume stitching.

Because square stitch is worked one bead at a time, it is lengthier stitch, like peyote. But because the technique is so easy, you’ll forget how much time each stitch takes and find yourself weaving up a storm.

A Panel of Square Stitch Beading
For a quick introduction to the technique, try out the Marching Cubes Bracelet by Marilyn Gardiner. You can also learn to do square stitch on the diagonal, using increases and decreases to make unique shapes. Start with a fun Twisty Wrap Bracelet by Marji Brohammer. And for some extra visual aids, check out the three part video series from Auntie’s Beads: Square Stitch Bugle Bracelet.
Candy Corn Bracelet
Happy beading!

Thứ Hai, 3 tháng 10, 2011


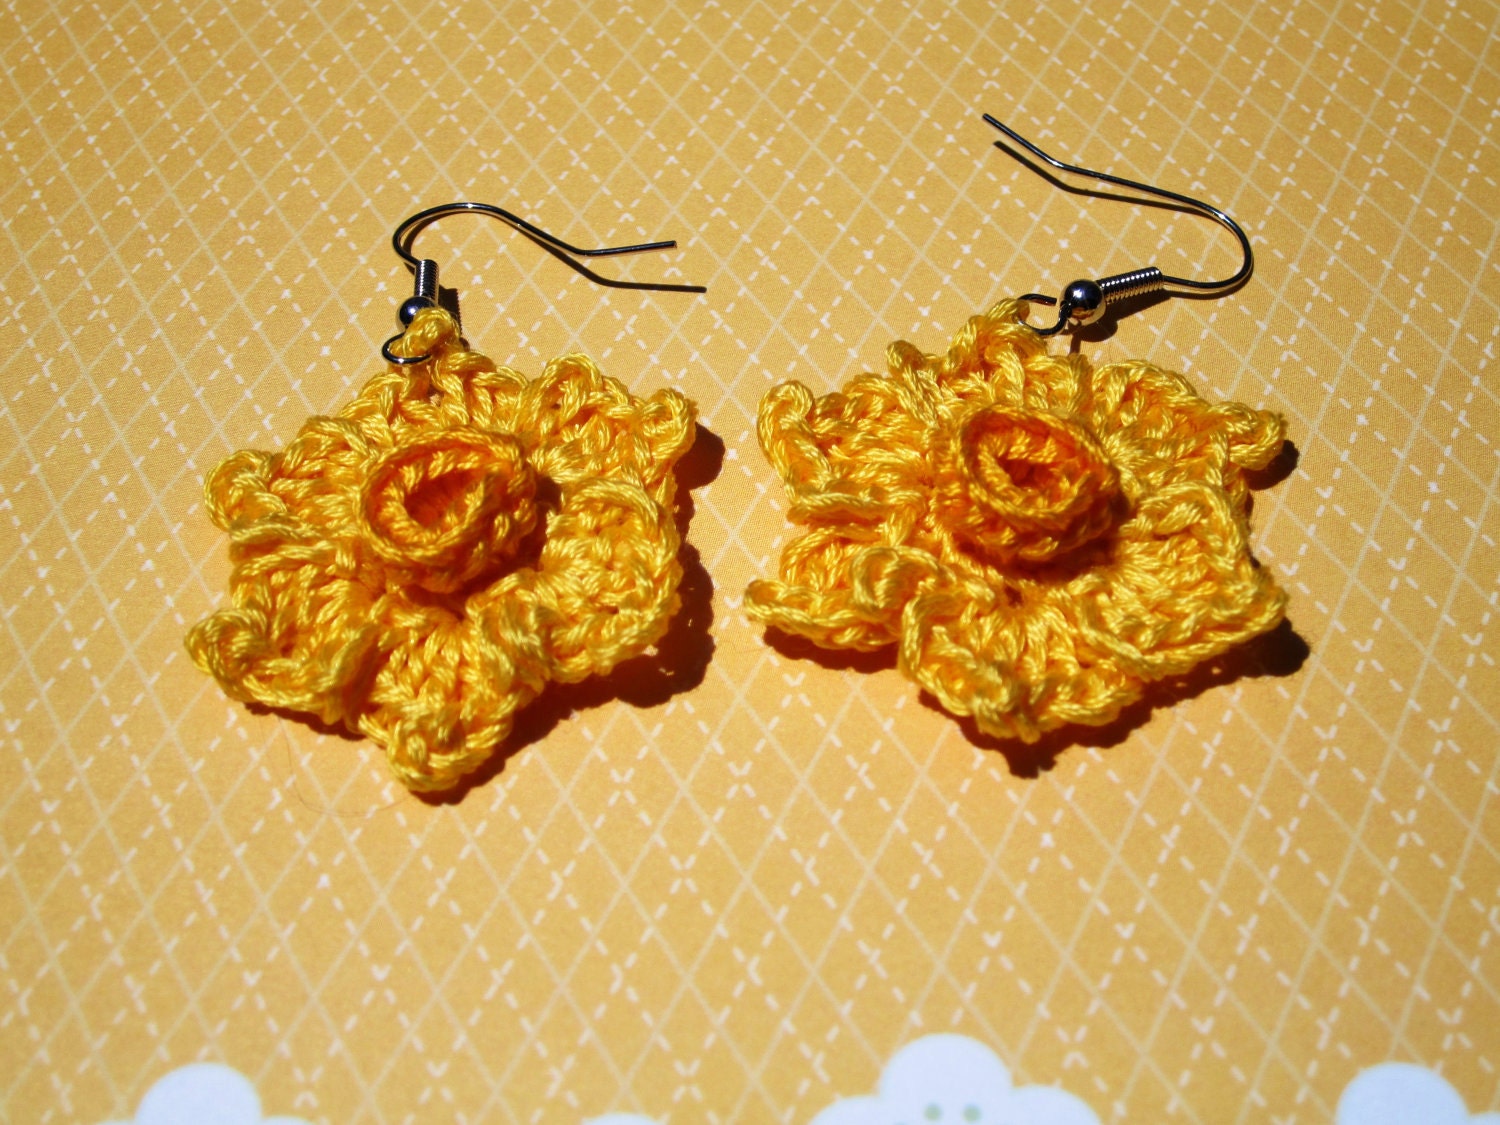
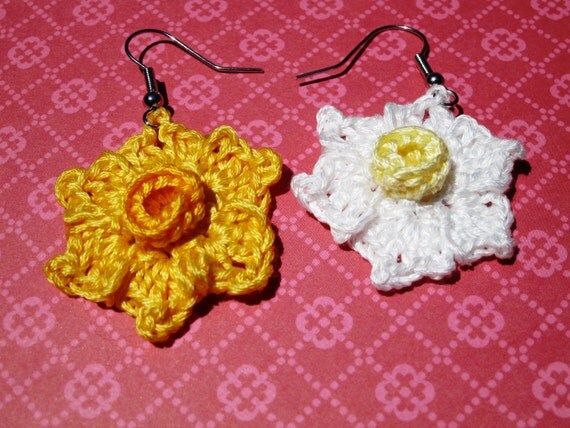
Each flower is about 1/2″ diameter and is made with DMC Six Strand Embroidery Floss, so it’s colorfast and fade resistant.
You have your choice of a pair of Daffodils, a pair of Narcissus, or one of each.  Colors can be changed to suite your taste.
Crafty jewelry, free crochet patterns: Daffodil / Narcissus Bracelet and earings

This bracelet is about 6″ long x 1/2″ wide and is made with DMC Six Strand Embroidery Floss.  It comes with 3 Daffodil and 3 Narcissus.
Length can be adjusted (in increments of 1/2″).  Each additional motif is an extra $1 each.  Please let me know if it needs to be longer.  I used my own wrist as measurement.
Colors can be changed to suite your taste.
See other posts for matching earrings.

Thứ Hai, 19 tháng 9, 2011


Lasting Friendship Bracelet Tutorial

At some point in time, a reversal of roles between mothers and daughters happen. My mother used to take me to places when I was young. Now I take her to places. It took sometime before this happened but the reversal of roles between me and Princess One occurred after 9 years - sooner than anticipated. The reversal of roles I'm referring to is her being my mentor in this crafting project. I let her walk me through all the steps to create this Lasting Friendship Bracelet tutorial, which I'm also sharing with you. I love naming projects and so this is called operation Lasting Friendship Bracelet tutorial.

Photobucket

Materials needed:
Beads with large openings
Hemp cord
Tape (painter's tape is used in this case)
Cardboard

Photobucket

You'll need the cardboard to make a loom. Cut any cardboard into a strip about 3 inches wide and 11 inches long. Cut two slits on both ends approximately half an inch away from each other.


Photobucket

Measure your wrist.

Photobucket

Whatever the size is, add 12 inches then cut 2 strips of hemp cord with this length. For example, Princess One's wrist is 7 inches in diameter so by adding 12 inches, we have a total length of 19 inches. Cut two 19-inch strips of the hemp cord.

Photobucket

Insert the hemp cords on the slits of the loom, making sure that approximately 6 inches of the cord are left hanging.

Photobucket

Tape these cords at the back of the loom to look like this. They are named Cord 1 and Cord 2.

Photobucket

Cut another hemp cord, called Cord 3, with a length double of Cord 1. Since in this case Cord 1 is 19 inches, Cord 3 should be 38 inches. Tie the end of Cord 3 to Cord 1 with a simple knot, leaving a tail of about 6 inches, then tucking its tail on the slit for Cord 1.

Photobucket

Pass through Cord 3 under Cord 1 and Cord 2, then insert a bead.

Photobucket

Make sure that the bead stays in the middle of Cord 1 and Cord 2.

Photobucket

Pass Cord 3 over Cord 2 going towards the bead, then insert it in the bead. By now, Cord 3 should be on the left side and the bead is snug.

Photobucket

To add the next bead, pass Cord 3 under Cord 1 and Cord 2 towards the right like the step did with the green bead.

Photobucket

After that, you're ready for your next bead.

Photobucket

Here's a little pictorial summary of the steps done earlier.

Photobucket

Photobucket

When you have reached the desired length, close the bracelet by tying the ends in a knot.

Photobucket

Make a clasp using another bead that you can easily slide up and down to close or loosen the bracelet.

Photobucket

Knot all the ends of the hemp cord and now you have a Lasting Friendship bracelet.

Photobucket

These are the bracelets we made together. It took us around 20 minutes to complete these beauties and it's so worth it!

Photobucket

How about you? Has there been a project where your kid led you to finish it?
nghe nhạc trực tuyếnNấu món chay | học nấu ăn DJ - Ảnh đẹp | xalotinnhanh